

Users
Invite and manage the people who can sign in to an Edmissa workspace.
Users are the people who sign in to Edmissa. A user account controls login details, account status, assigned roles, location access, supervisors, password setup, and active sessions.
Use this guide when you need to invite a team member, update a user's access, assign a supervisor, reset a password, or deactivate an account.
Before you start
Prepare these items before adding users:
| Item | Why it matters |
|---|---|
| Location assignment | Active users normally need at least one active location. |
| Role assignment | Each user needs at least one role before they have useful working access. |
| Login details | Your workspace may require email, phone number, or both. |
| Supervisor plan | Decide who the user reports to when manager visibility matters. |
| Password setup choice | Decide whether the user should receive an invite link or start with a manual password. |
Create or confirm locations and roles before inviting the full team.
Open user management
Use this path when you want to add or manage users:
- Open Settings.
- Select Users.
The User Management page includes All, Active, and Inactive user tabs, search, role-based filtering, user statistics, active session counts, and a table of users.
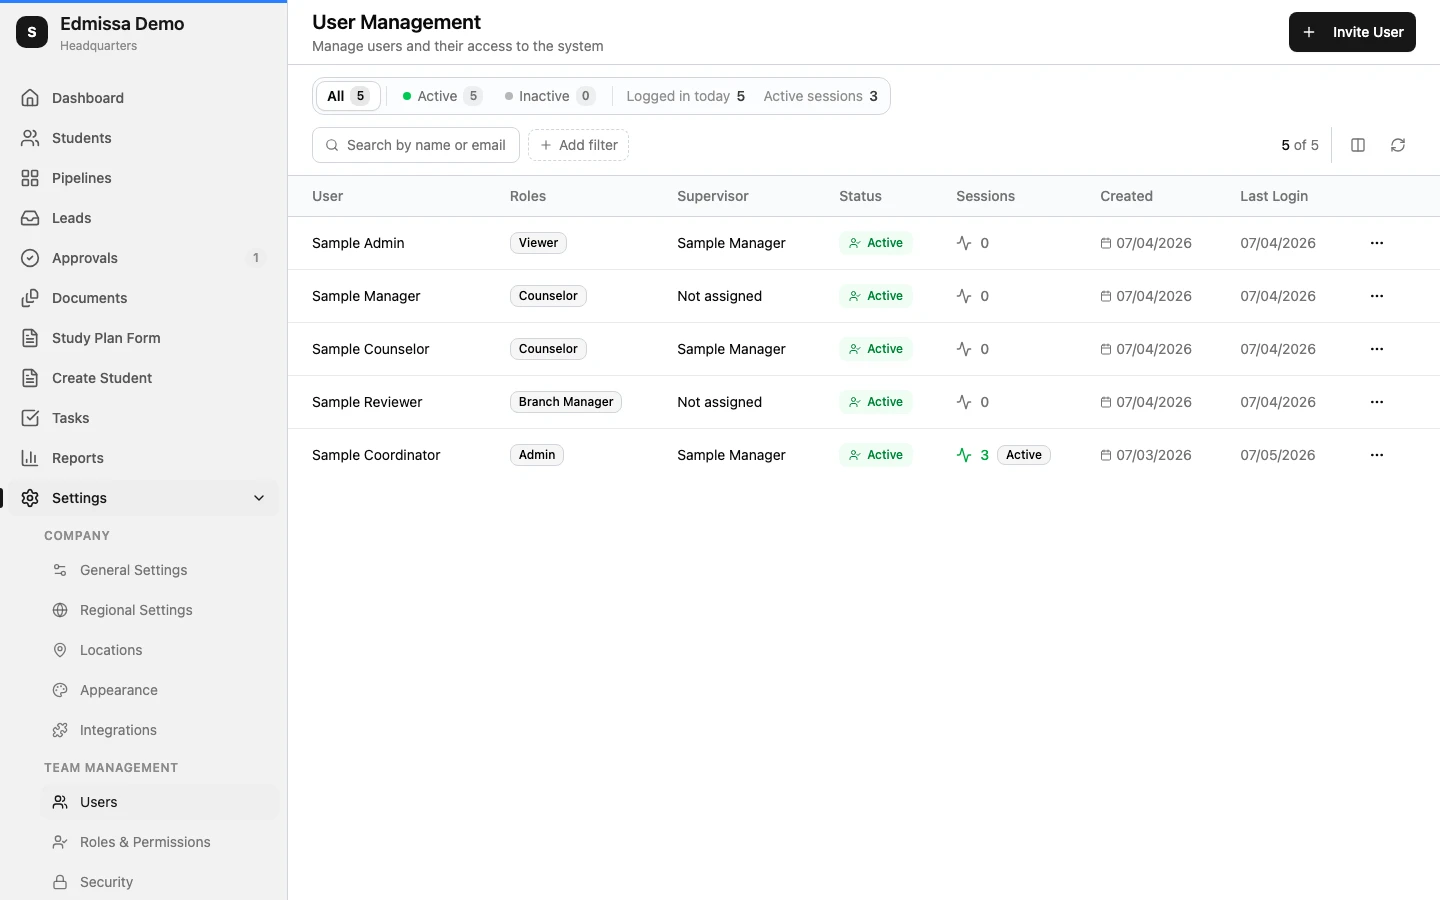
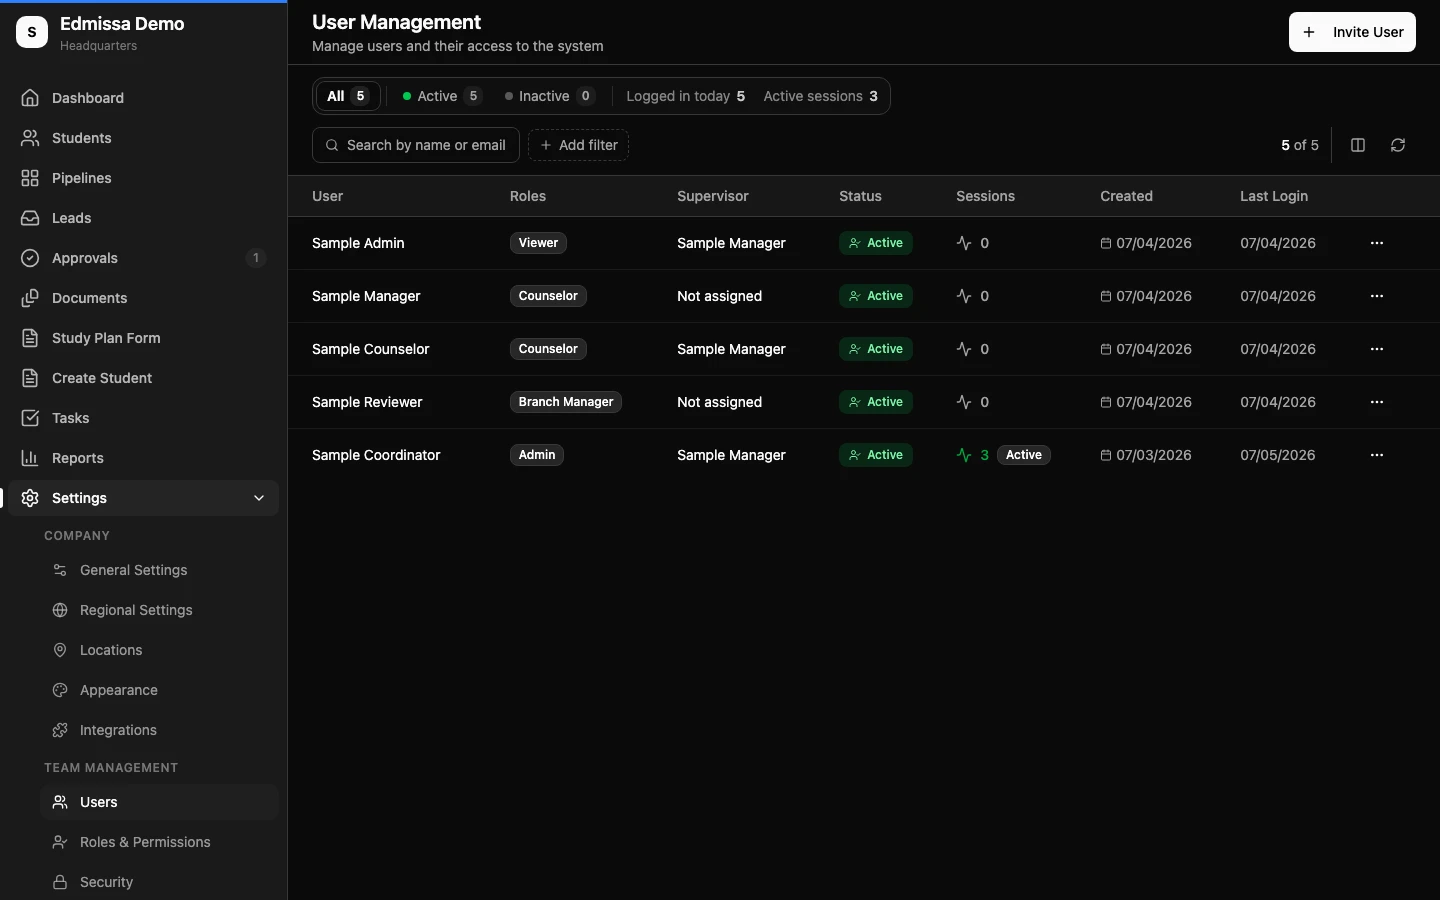
The table can show:
| Column | What it tells you |
|---|---|
| User | The user's name, email, and phone number when phone login is enabled. |
| Roles | The roles currently assigned to the user. |
| Supervisor | The user this person reports to, if one is assigned. |
| Status | Whether the account is active, inactive, locked, or still pending an invite. |
| Sessions | How many active sessions the user currently has. |
| Created | When the account was created. |
| Last Login | The most recent login date, or Never. |
Use the row menu to view details, edit the user, manage roles, manage the supervisor, reset the password, end active sessions, unlock the account, activate or deactivate the user, or delete the user.
Create a user
Use this flow when adding a team member:
- Open Settings.
- Select Users.
- Select Invite User.
- Enter First Name and Last Name.
- Enter the login details required by your workspace, such as email, phone number, or both.
- Choose whether to send an invite link or set a password manually.
- Select at least one role.
- Assign at least one location.
- Confirm or choose the default location.
- Keep Active Account turned on if the user should be able to sign in.
- Create the user.
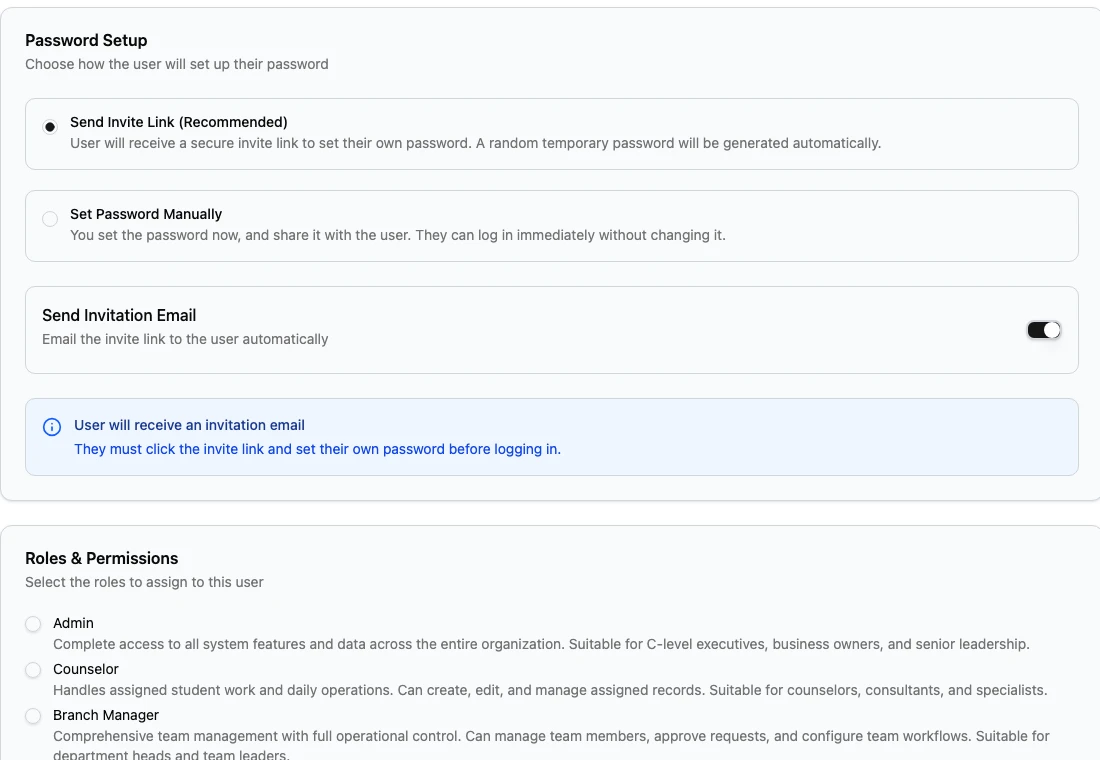
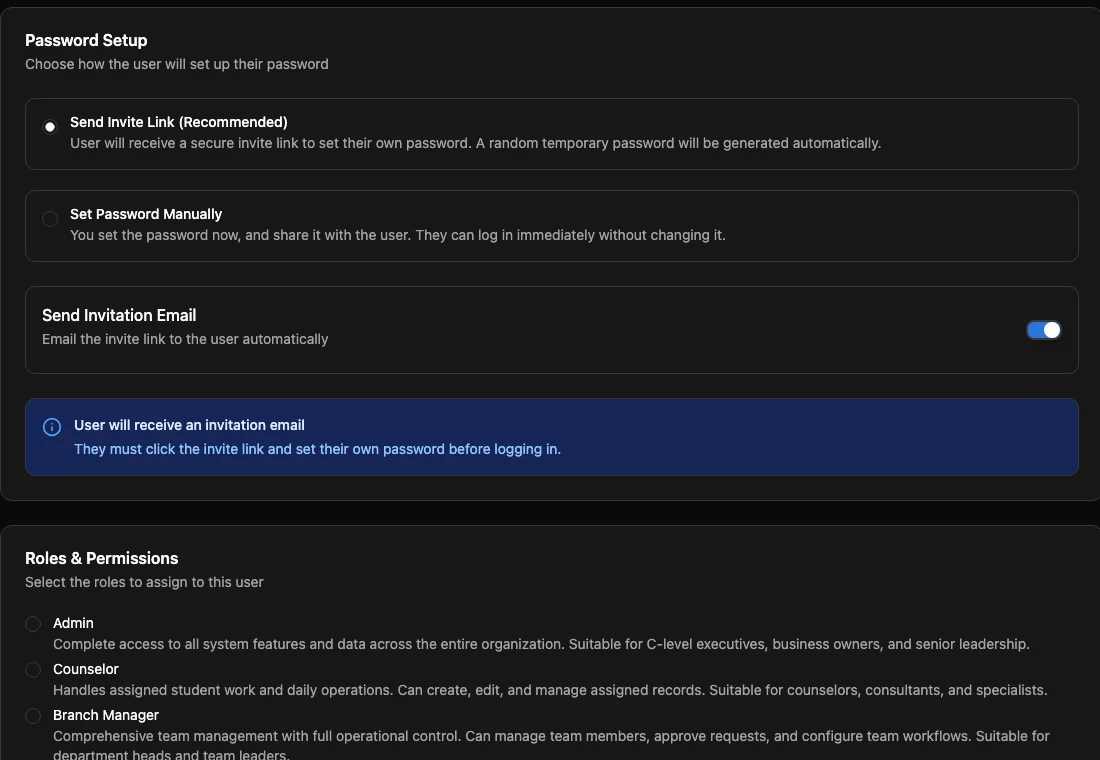
When Send Invite Link is selected, Edmissa generates a secure invite link so the user can set their own password. If Send Invitation Email is turned on, the invite is emailed automatically. If it is turned off, copy the invite link from the user profile and share it directly. Invite links expire after seven days.
When Set Password Manually is selected, the admin enters a password that follows the workspace password policy. Share manually created passwords through a safe channel and ask the user to change it when appropriate.
Required user details
| Setting | How to use it |
|---|---|
| First Name and Last Name | Use the person's real working name so assignments and reports are readable. |
| Email Address | Required when the workspace uses email login. Also used for notifications. |
| Phone Number | Required when the workspace uses phone login. |
| Roles | At least one role is required. Multiple roles combine permissions. |
| Locations | At least one active location is required for normal users. |
| Default Location | The primary location used when a user belongs to more than one location. |
| Active Account | Allows the user to sign in and work in Edmissa. |
If no default location is selected, Edmissa uses the first assigned location as the default.
Manage an existing user
Open a user from the User Management table when you need to review their access or account status.
Use these actions carefully:
| Action | Use it when |
|---|---|
| Edit User | Update name, email, roles, locations, active status, or password-change requirement. |
| Manage Roles | Change role assignments and review the effective permissions from all selected roles. |
| Manage Supervisor | Set or remove the user's supervisor. |
| Reset Password | Set a new password for the user. |
| End Sessions | Sign the user out of active sessions. |
| Unlock Account | Clear an account lock after the login issue is resolved. |
| Deactivate | Stop the user from signing in while keeping their historical work visible. |
| Delete User | Remove the user account when it should no longer exist. Use deactivation when you only need to stop access. |
Sensitive changes may ask the admin to confirm their identity again. Role changes, deactivation, password resets, and deletion should be treated as privileged actions.
An admin cannot deactivate or delete their own account from the user row actions.
Use supervisors
Supervisors help represent who a user reports to.
Use this flow to assign a supervisor:
- Open Settings.
- Select Users.
- Open the user.
- Select Manage Supervisor.
- Choose an active user as the supervisor.
- Select Assign Supervisor.
Supervisor rules:
| Rule | Meaning |
|---|---|
| One supervisor | A user can have one supervisor at a time. |
| No self-supervision | A user cannot be their own supervisor. |
| No circular chain | Edmissa prevents reporting loops. |
| Active supervisors only | Inactive users cannot be assigned as supervisors. |
Use supervisors for team visibility and manager review. Use locations for branch or operating access. Use roles for permissions.
Test a user before inviting the team
Before inviting the full team:
- Create one safe test user.
- Assign the same role and location pattern planned for real users.
- Sign in as the test user.
- Confirm the user can open the correct pages.
- Confirm the user can see the correct students and applications.
- Confirm restricted records and settings are hidden.
- Deactivate the test user or keep it clearly marked for future checks.
Test with sample records in more than one location when your agency has multiple branches.
Related guides
| Guide | Use it for |
|---|---|
| Roles | Create the roles that users receive. |
| Permissions and scope | Understand why a user can or cannot see records and actions. |
| Locations | Configure the location assignments required for users. |
| Security and audit | Review passwords, sessions, account protection, and audit history. |
| Access and permissions troubleshooting | Diagnose missing pages, disabled actions, and account access problems. |