

Fields
Plan and configure the student and application fields your agency uses across forms, applications, search, and reporting.
Fields define the information your Edmissa workspace stores and shows to users. Set them up carefully before you build form templates, pipeline stage requirements, filters, reports, or daily work views.
What Field Management Controls
Field Management has three main areas.
| Area | Use it for |
|---|---|
| Student fields | Store information that belongs to the student profile, such as name, contact details, nationality, study interest, and source details. |
| Application fields | Store information that belongs to an application in a selected pipeline, such as university name, intake, deadline, offer status, and visa outcome. |
| Display configuration | Decide which fields appear in profile and application views, how they are grouped into sections, and how each field is displayed. |
The important difference is ownership. Student fields follow the student. Application fields follow one application in one pipeline.
When To Create Each Field Type
Use this table before adding a field.
| If the information describes | Create it as |
|---|---|
| The student as a person | Student field |
| Contact details, nationality, passport details, or study preferences | Student field |
| Information that should stay with the student across multiple applications | Student field |
| One university, college, program, or intake choice | Application field |
| A deadline, submission date, offer status, visa step, or outcome for one application | Application field |
| Information that changes by pipeline | Application field |
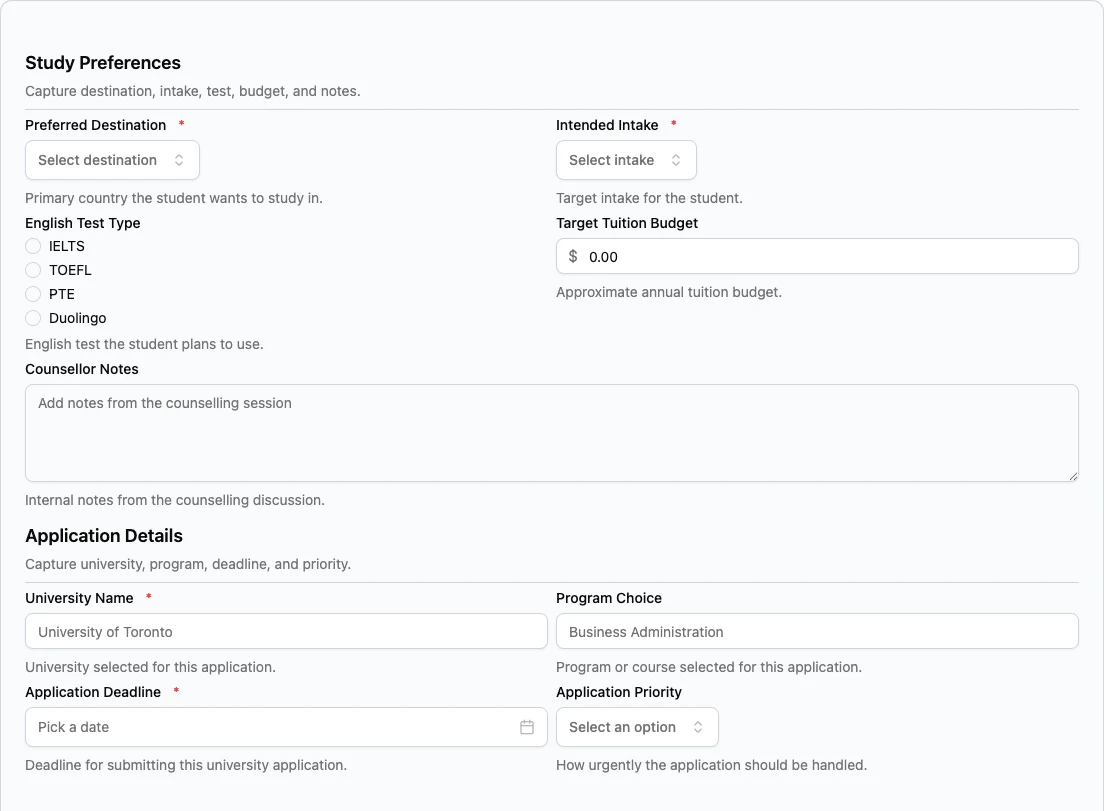
For example, Preferred Destination can be a student field because it belongs to the student's profile. University Name is usually an application field because one student can apply to more than one institution.
Recommended Setup Order
- Review the Student Visa Processing pipeline so you know what work the team needs to track.
- List the student information your agency needs before the first application is started.
- List the application information needed inside each pipeline stage.
- Create field groups so related fields stay together.
- Create fields with the right category, type, configuration, and validation.
- Use display configuration to decide what users see in daily work views.
- Connect the fields to form templates and pipeline stage forms.
Start with fields the team really uses. Add more later when a workflow proves the need.
Field Guides
| Guide | Use it for |
|---|---|
| Student fields | Create and manage the fields that belong to student profiles. |
| Application fields | Create and manage pipeline fields, using Student Visa Processing as the first example. |
| Field categories and types | Choose between basic, compound, repeating, and custom field types. |
| Field categories | Understand each category before choosing a type. |
| Field types | Review each individual field type. |
| Field configuration | Understand the settings available for each field type. |
| Validation | Decide which fields should be required and which values should be accepted. |
| Search settings | Make important student fields searchable and control quick search behavior. |
| Display configuration | Organize fields into sections, manage layout, and customize field display. |